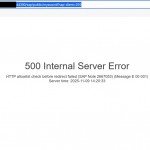
If you get “Checkpoint Not Complete” message from your “Alert.log” via DB13 tcode, it means that probably your REDOLOG file sizes are smaller than the oracle db needed.
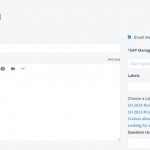
DB13 tcode show us following screen in case of situation ;
![]()
Simply technical explanation is ;
File switching operation has cancelled between REDOLOG files while “Checkpoint” process is not completed.
Then we should enlarge the related redolog files with following procedure.
– Firstly we should check the size and quantity of the redolog files ;
SQL>select GROUP#,SEQUENCE#,BYTES/1024/1024, STATUS from v$log;
GROUP# SEQUENCE# BYTES/1024/1024 STATUS
———- ———- ————— —————-
1 280446 50 CURRENT
2 280443 50 INACTIVE
3 280445 50 ACTIVE
4 280444 50 ACTIVE
– Now we have to find the file locations for these redolog files via “Control File”
We should create controlfile trace file like below ;
SQL> alter database backup controlfile to trace as ‘c:\cnt.sql’;
Database altered.
– We can find the REDOLOG files’ Size and Location informations like example ;
LOGFILE
GROUP 1 (
‘E:\ORACLE\SID\ORIGLOGA\LOG_G11M1.DBF’,
‘Y:\ORACLE\SID\MIRRLOGA\LOG_G11M2.DBF’
) SIZE 50M BLOCKSIZE 512,
GROUP 2 (
‘E:\ORACLE\SID\ORIGLOGB\LOG_G12M1.DBF’,
‘Y:\ORACLE\SID\MIRRLOGB\LOG_G12M2.DBF’
) SIZE 50M BLOCKSIZE 512,
GROUP 3 (
‘E:\ORACLE\SID\ORIGLOGA\LOG_G13M1.DBF’,
‘Y:\ORACLE\SID\MIRRLOGA\LOG_G13M2.DBF’
) SIZE 50M BLOCKSIZE 512,
GROUP 4 (
‘E:\ORACLE\SID\ORIGLOGB\LOG_G14M1.DBF’,
‘Y:\ORACLE\SID\MIRRLOGB\LOG_G14M2.DBF’
) SIZE 50M BLOCKSIZE 512
– Now we should create new 4 REDOLOG files’ with size 250 Mb like below ;
SQL> ALTER DATABASE ADD LOGFILE GROUP 5 (‘E:\ORACLE\SID\ORIGLOGA\LOG_G5M1.DBF’, ‘Y:\ORACLE\SID\MIRRLOGA\LOG_G5M2.DBF’)
SIZE 250M BLOCKSIZE 512;
Database altered.
SQL> ALTER DATABASE ADD LOGFILE GROUP 6 (‘E:\ORACLE\SID\ORIGLOGB\LOG_G6M1.DBF’, ‘Y:\ORACLE\SID\MIRRLOGB\LOG_G6M2.DBF’)
SIZE 250M BLOCKSIZE 512;
Database altered.
SQL> ALTER DATABASE ADD LOGFILE GROUP 7 (‘E:\ORACLE\SID\ORIGLOGA\LOG_G7M1.DBF’, ‘Y:\ORACLE\SID\MIRRLOGA\LOG_G7M2.DBF’)
SIZE 250M BLOCKSIZE 512;
Database altered.
SQL> ALTER DATABASE ADD LOGFILE GROUP 8 (‘E:\ORACLE\SID\ORIGLOGB\LOG_G8M1.DBF’, ‘Y:\ORACLE\SID\MIRRLOGB\LOG_G8M2.DBF’)
SIZE 250M BLOCKSIZE 512;
Database altered.
– It’s time to check REDOLOG status to see our new REDOLOG files , we should see 4 old redolog files and 4 new redolog files
SQL> SELECT GROUP#, ARCHIVED, STATUS FROM V$LOG;
GROUP# ARC STATUS
———- — —————-
1 NO CURRENT
2 YES INACTIVE
3 YES INACTIVE
4 YES INACTIVE
5 YES UNUSED
6 YES UNUSED
7 YES UNUSED
8 YES UNUSED
– Now we have to DROP old REDOLOG files
SQL> ALTER DATABASE DROP LOGFILE GROUP 4;
Database altered.
SQL> ALTER DATABASE DROP LOGFILE GROUP 3;
Database altered.
SQL> ALTER DATABASE DROP LOGFILE GROUP 2;
Database altered.
SQL> ALTER DATABASE DROP LOGFILE GROUP 1;
Database altered.
Important Point : We should be sure that related redolog file has “INACTIVE” status while DROP operation working on it otherwise we will get an error message.
We can move the INACTIVE situation over the redolog file manually with following SQL command ;
Sometimes we need to execute several times…
SQL> alter system switch logfile;
System altered.
– Finally we can check the REDOLOG files status via following SQL command , we should see 4 new redolog files with new sizes
SQL> select GROUP#,SEQUENCE#,BYTES/1024/1024, STATUS from v$log;
GROUP# SEQUENCE# BYTES/1024/1024 STATUS
———- ———- ————— —————-
5 280760 250 ACTIVE
6 280761 250 CURRENT
7 280758 250 ACTIVE
8 280759 250 ACTIVE